peterbilt 389 service manual pdf

The Peterbilt 389 Service Manual is an essential guide for owners and mechanics, providing comprehensive instructions for maintenance, repairs, and troubleshooting to ensure optimal truck performance and safety.

Overview of the Manual and Its Importance

The Peterbilt 389 Service Manual is a detailed guide designed to assist owners, operators, and mechanics in maintaining, repairing, and troubleshooting the Peterbilt 389 truck. It covers essential systems, components, and procedures, ensuring optimal performance and safety. The manual emphasizes preventive maintenance schedules, diagnostic techniques, and repair best practices. Its comprehensive structure makes it an indispensable resource for extending the truck’s lifespan and preventing costly downtime. Regular use of this manual ensures compliance with manufacturer recommendations, promoting reliability and efficiency in daily operations.

Preventive Maintenance Schedule

The Peterbilt 389 Service Manual outlines a detailed preventive maintenance schedule, ensuring timely inspections and services to maintain performance, safety, and efficiency.

Regular Maintenance Tasks and Intervals

The Peterbilt 389 Service Manual specifies regular maintenance tasks and intervals to ensure optimal performance and safety. These include oil changes every 15,000 to 25,000 miles, lubrication of components, and inspection of tires, brakes, and suspension systems. The schedule also covers drivetrain and electrical system checks, with detailed intervals for tasks like replacing air filters and checking coolant levels. Adhering to these intervals helps prevent breakdowns and extends the truck’s lifespan. Regular servicing ensures compliance with safety standards and maintains fuel efficiency.

Oil Changes and Lubrication Requirements

The Peterbilt 389 Service Manual outlines specific oil change intervals and lubrication requirements to maintain engine health. Oil changes are recommended every 15,000 to 25,000 miles, depending on usage. Synthetic oil is preferred for optimal performance. Differential oil should be changed every 50,000 miles, while hub lubrication is needed every 30,000 miles. U-joints require greasing every 10,000 miles. The manual also specifies NLGI 2 grease for chassis components, ensuring proper lubrication for smooth operation and longevity of the truck’s systems.

Electrical Systems

The Peterbilt 389 electrical system is complex, involving wiring harnesses, circuits, and connectors. The manual provides detailed schematics and troubleshooting guides to ensure proper functionality and safety.

Understanding the Electrical Schematic

The Peterbilt 389 electrical schematic provides a detailed visual representation of the truck’s electrical system, including wiring harnesses, circuits, and connectors. It helps technicians identify components, trace connections, and diagnose issues efficiently. The manual includes step-by-step guides for analyzing the schematic, ensuring accurate troubleshooting of electrical faults. By understanding the schematic, users can locate power sources, ground connections, and relay modules, making repairs safer and more effective. Regular reference to the manual ensures proper system functionality and prevents potential electrical failures.

Troubleshooting Common Electrical Issues

The Peterbilt 389 service manual outlines methods to diagnose electrical problems such as faulty wiring, blown fuses, or malfunctioning sensors. It provides a systematic approach to identify issues using diagnostic tools and the electrical schematic. Techniques include checking power supplies, testing circuits, and inspecting connectors for damage or corrosion. The manual also lists common fault codes and their solutions, helping technicians resolve problems efficiently. Regular troubleshooting ensures reliable operation and minimizes downtime for the vehicle.
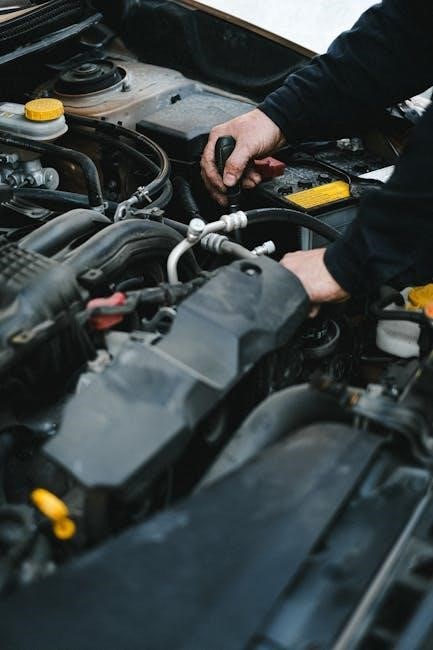
Engine Maintenance

Regular engine inspections and component checks are crucial for maintaining performance and longevity. Adhere to the manual’s guidelines for routine maintenance and repairs.

Inspecting and Replacing Engine Components

Regular inspection of engine components ensures optimal performance and prevents costly repairs. Check air filters, belts, and hoses for wear or damage. Inspect cylinder heads, valves, and piston rings for signs of wear. Replace spark plugs and fuel injectors as recommended. Lubricate moving parts and ensure proper coolant levels. Address any leaks promptly, and refer to the manual for torque specifications when replacing components. Proper maintenance extends engine life and maintains efficiency.

Diagnosing Engine Performance Problems

Identify engine issues by checking warning lights and fault codes using diagnostic tools. Monitor performance metrics like power loss, unusual noises, or decreased fuel efficiency. Inspect for coolant or oil leaks, and test compression to detect internal damage. Verify proper air filter condition and exhaust system functionality. Consult the manual for specific troubleshooting steps and repair procedures to address issues effectively and ensure reliable engine operation.

Air Systems

The Peterbilt 389 service manual emphasizes proper air system maintenance, including inspecting the air dryer, tanks, and lines for leaks and damage to ensure optimal performance.

Inspecting the Air Dryer and Tanks

Regular inspection of the air dryer and tanks is crucial for maintaining the Peterbilt 389’s air system efficiency. The manual outlines steps to check for moisture buildup, corrosion, and leaks in the air dryer. Inspect the tanks for dents, rust, and damage, ensuring all connections are secure. Proper maintenance prevents system failure, ensuring reliable braking and pneumatic functions. Follow the recommended schedule to drain moisture and replace desiccant cartridges as needed for optimal performance and safety.

Troubleshooting Air System Leaks

Identifying air system leaks in the Peterbilt 389 requires a systematic approach. Start with a pressure test to locate hissing sounds or visible air escaping from connections. Inspect all hoses, valves, and fittings for cracks or loose connections. Use the manual’s guidelines to check the air dryer and tanks for moisture buildup, which can indicate internal leaks. Drain accumulated moisture and inspect seals for wear. Addressing leaks promptly prevents system pressure loss, ensuring reliable braking and pneumatic functions. Regular maintenance as outlined in the manual is essential to avoid potential safety hazards and performance issues.

Brake Systems

The Peterbilt 389 brake system ensures reliable stopping power, featuring components like brake pads, rotors, and slack adjusters. Regular inspections and maintenance are critical for optimal performance and safety.

Inspecting Brake Pads and Rotors

Inspecting brake pads and rotors on the Peterbilt 389 is crucial for ensuring braking efficiency. Pads should be checked for wear, with replacement needed if thickness falls below 1/8 inch. Rotors must be examined for cracks, scoring, or excessive wear. Any damage or uneven wear patterns require immediate attention to prevent brake failure. Regular inspections help maintain safety and prevent costly repairs.

Adjusting Brake Systems for Optimal Performance

Adjusting the brake system on the Peterbilt 389 ensures safe and efficient stopping power. Start by checking brake fluid levels and inspecting for leaks. Slack adjusters must be calibrated to maintain proper brake shoe alignment. Ensure all components, including camshaft bearings and brake pads, are functioning correctly. After adjustments, test the brakes under controlled conditions to confirm optimal performance. Refer to the service manual for specific torque values and adjustment procedures to ensure reliability and safety on the road.

Transmission and Drivetrain

The Peterbilt 389’s transmission and drivetrain require regular maintenance to ensure smooth power delivery and durability. Check fluid levels, inspect filters, and monitor driveshaft alignment for optimal performance and to prevent premature wear.

Inspecting Transmission Fluid and Filters

Regular inspection of the transmission fluid and filters is crucial for maintaining the Peterbilt 389’s drivetrain health. Check the fluid level using the dipstick, ensuring it reaches the recommended mark. The fluid should be clean and free from contamination or debris. Inspect the filter for dirt or damage, replacing it as specified in the service manual. Proper fluid levels and clean filters ensure smooth gear engagement and prevent overheating. Always use the recommended fluid type and filter replacements to maintain optimal transmission performance and longevity.

Driveshaft and U-Joint Maintenance

Regular inspection of the driveshaft and U-joints ensures smooth power transmission and prevents costly repairs. Lubricate U-joints at each service interval using NLGI grade 2 grease, as specified in the manual. Inspect the driveshaft for any signs of damage, wear, or misalignment. Check U-joints for excessive play or corrosion, replacing them if necessary. Proper maintenance prevents vibration issues and ensures optimal drivetrain performance, enhancing safety and reducing wear on connected components.

Cooling Systems

The Peterbilt 389 cooling system ensures engine thermal regulation, preventing overheating. Regular checks of hoses, coolant levels, and extended life coolant integrity are crucial for optimal function.

Inspecting Hoses and Coolant Levels

Inspecting hoses and coolant levels is vital for maintaining the Peterbilt 389’s cooling system. Check hoses for leaks, cracks, or signs of wear. Ensure coolant levels are within recommended specifications, using a 50/50 mix of extended-life coolant and distilled water. Test coolant freeze points with strips and replace if contaminated. Regular inspections prevent overheating and extend engine life, ensuring reliable performance and reducing repair costs. Always follow manual guidelines for accurate assessments and maintenance.

Preventing Overheating Issues

To prevent overheating in the Peterbilt 389, regularly inspect the cooling system. Check coolant levels, ensuring a 50/50 mix of extended-life coolant and distilled water. Test freeze points using strips and replace coolant if contaminated. Inspect hoses and connections for leaks or damage, and ensure they are secure. Flush the system periodically to maintain efficiency. Monitor the temperature gauge while driving and address any unusual readings promptly. Keep the radiator clean and ensure proper airflow by checking the fan and shroud. Address any leaks or issues immediately to avoid engine damage.

Suspension and Steering

Regular inspection of springs, shackles, and steering components ensures proper handling and safety, while alignment adjustments maintain optimal vehicle performance and reduce wear on tires and suspension parts.

Inspecting Springs and Shackles

Regular inspection of springs and shackles is crucial for maintaining the integrity of the suspension system. Visually examine springs for cracks, worn bushings, or excessive corrosion. Shackles should be checked for wear, misalignment, or loose connections. Ensure all components are securely fastened and properly aligned. Refer to the Peterbilt 389 service manual for torque specifications and adjustment procedures. Proper maintenance prevents premature wear and ensures safe, stable vehicle handling. Always follow safety guidelines when inspecting heavy machinery components.

Aligning the Steering System

Proper alignment of the steering system ensures precise control and reduces tire wear. Use specialized tools to measure toe-in and camber angles, adjusting as needed. Check the drag link, idler arm, and pitman arm for wear or looseness. Tighten all connections to specified torque values. The Peterbilt 389 service manual provides detailed steps for alignment procedures. Regular checks and adjustments optimize steering performance and enhance overall vehicle stability. Always refer to the manual for specific instructions and safety precautions during the alignment process.

Fuel Systems

The Peterbilt 389 service manual details fuel system components, including tanks, lines, and pumps. Regular inspections ensure proper function, efficiency, and emissions compliance. Addressing leaks and wear prevents performance issues and maintains reliability;

Inspecting Fuel Tanks and Lines

Inspecting fuel tanks and lines is crucial for maintaining the Peterbilt 389’s performance and safety. Check for dents, rust, or punctures in the fuel tanks. Ensure all connections are secure and free from leaks. Inspect fuel lines for signs of wear, abrasion, or damage. Verify proper installation of fuel tank straps and brackets. Follow the service manual’s guidelines for pressure testing fuel systems to detect any hidden leaks. Regular inspections prevent fuel system failures and ensure reliable operation. Always adhere to safety precautions when handling fuel components.

Troubleshooting Fuel System Issues

Troubleshooting fuel system issues in the Peterbilt 389 involves identifying common problems like leaks, contamination, or faulty components. Start by inspecting fuel lines and connections for cracks or damage. Check for blockages in fuel filters or injectors, which can restrict fuel flow. Use diagnostic tools to identify error codes related to the fuel system. Consult the service manual for specific repair procedures, such as replacing faulty fuel pumps or cleaning clogged injectors. Proper troubleshooting ensures efficient fuel system operation and prevents costly repairs.

Exhaust Systems

Regular inspections of the exhaust system ensure optimal performance, reduce emissions, and prevent damage. Adhering to safety guidelines is crucial during maintenance and repairs.

Inspecting Exhaust Components

Inspecting exhaust components is crucial for ensuring system efficiency and safety. The Peterbilt 389 service manual outlines procedures for examining the exhaust pipes, mufflers, and clamps for damage, leaks, or corrosion. It’s important to check for any signs of wear or deterioration, as these can lead to performance issues or safety hazards. Regular inspections help maintain the integrity of the exhaust system, ensuring compliance with emissions standards and preventing costly repairs. Always follow the manual’s guidelines for proper inspection techniques and safety precautions.

Ensuring Proper Exhaust System Function

Proper exhaust system function is vital for engine performance and emissions compliance. The Peterbilt 389 service manual provides detailed steps to ensure the exhaust system operates efficiently. This includes verifying that all connections are secure, checking for blockages, and ensuring that the exhaust gases flow freely. Regular maintenance, such as replacing damaged components and cleaning the system, helps prevent issues like backpressure, which can degrade engine efficiency. By following the manual’s guidelines, you can maintain optimal exhaust system performance and extend the life of your truck.

Safety Guidelines

Always follow safety precautions when working with heavy machinery to prevent injuries and ensure proper repairs. Adhere to emergency procedures outlined in the manual for safe operations.

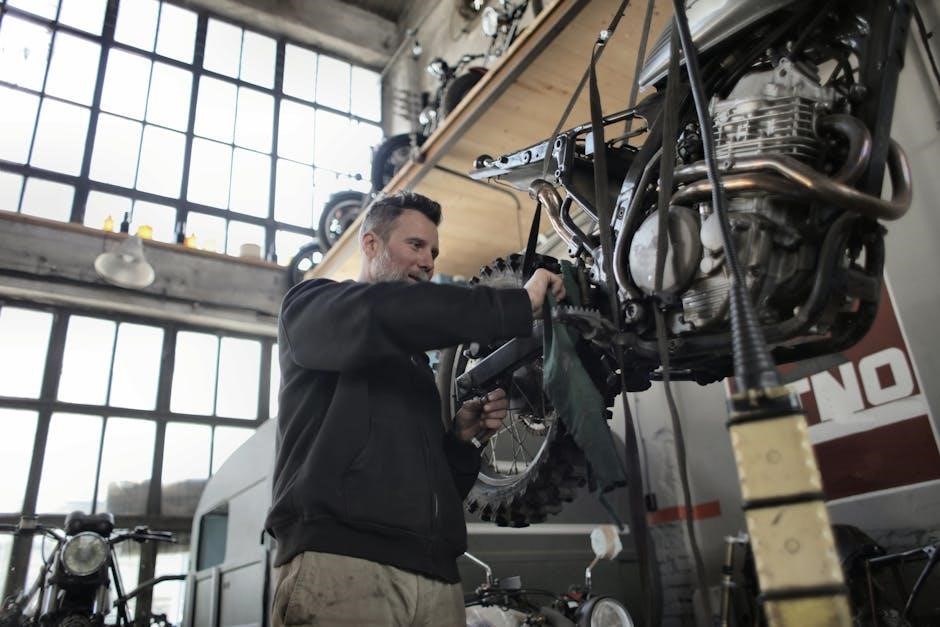
Precautions When Working with Heavy Machinery

When working with the Peterbilt 389, always wear proper PPE, including gloves, safety glasses, and steel-toe boots. Ensure the truck is on level ground with the parking brake engaged and wheels chocked. Disconnect the battery ground strap before starting any repairs. Use jack stands for added safety when working underneath the vehicle. Never attempt repairs near open flames or sparks, and keep a fire extinguisher nearby. Follow all safety guidelines outlined in the manual to prevent accidents and ensure proper repair procedures.

Emergency Procedures

In case of an emergency, such as a fire or system failure, refer to the Peterbilt 389 Service Manual for specific protocols. Evacuate the area immediately and contact emergency services. For fire incidents, use a Class B fire extinguisher rated for fuel and electrical fires. If a breakdown occurs, activate hazard lights and move to a safe location. Always maintain a first aid kit and emergency contact list in the truck. Follow the manual’s guidelines to ensure safety and minimize damage during critical situations.

Troubleshooting Common Issues

The Peterbilt 389 Service Manual provides a detailed guide for troubleshooting common issues, ensuring safe and efficient repairs with adherence to established safety protocols.

Identifying and Addressing Fault Codes

The Peterbilt 389 Service Manual provides detailed guidance on identifying and addressing fault codes to ensure quick and effective troubleshooting. It outlines diagnostic tools and procedures, enabling users to pinpoint issues accurately. The manual covers common fault codes related to electrical, engine, and air systems, offering step-by-step solutions. Regular checks and adherence to the manual’s recommendations help prevent major repairs and maintain optimal vehicle performance. This section is crucial for maintaining operational efficiency and safety.

Resolving Performance Problems

The Peterbilt 389 Service Manual offers comprehensive strategies for diagnosing and resolving performance issues. It covers engine, transmission, and drivetrain diagnostics, providing detailed procedures for troubleshooting. The manual emphasizes regular inspections and maintenance to prevent issues and optimize efficiency. By following the outlined steps, users can identify root causes, address problems effectively, and restore peak performance. This section is vital for maintaining reliability and minimizing downtime.

The Peterbilt 389 Service Manual is a comprehensive resource for maintaining and repairing your truck. Following its guidelines ensures optimal performance, safety, and longevity of your vehicle.

Summarizing Key Maintenance Practices

Regular maintenance is crucial for the Peterbilt 389, including oil changes, lubrication, and inspections of brakes, tires, and electrical systems. Adhering to the service manual ensures optimal performance, prevents breakdowns, and extends vehicle lifespan. Routine checks of air dryers, coolant levels, and drivetrain components are essential. Proper lubrication and timely replacements of worn parts help maintain efficiency and safety. Following the manual’s guidelines ensures compliance with safety standards and minimizes repair costs, keeping the truck in peak condition for years.

Importance of Regular Servicing

Regular servicing for the Peterbilt 389 is vital for maintaining its performance, reliability, and longevity. It helps prevent major repairs by identifying potential issues early. Consistent maintenance ensures compliance with safety regulations and reduces downtime. Properly serviced trucks experience improved fuel efficiency and lower operational costs. Regular inspections and timely part replacements also enhance driver safety and overall vehicle functionality. Adhering to the service manual’s recommendations ensures the truck operates at its best, making it a critical part of responsible ownership and fleet management.

Additional Resources

Explore official Peterbilt websites, forums, and service centers for genuine parts, updated manuals, and expert advice to complement your Peterbilt 389 service manual.

Recommended Tools and Equipment

The Peterbilt 389 Service Manual PDF recommends specific tools and equipment for effective maintenance and repairs. Essential tools include a torque wrench, multimeter, air compressor, and pneumatic tools. Additionally, diagnostic software and a wiring diagram are crucial for troubleshooting electrical issues. Safety gear like jack stands and wheel chocks is also necessary. These resources ensure comprehensive servicing, helping to maintain the truck’s performance and longevity. Proper tools and equipment are vital for safe and efficient maintenance procedures. Always refer to the manual for specific tool requirements.

Online Forums and Communities

Online forums and communities are invaluable resources for Peterbilt 389 owners and technicians. Platforms like TruckersForum and Peterbilt enthusiasts’ groups offer discussions on maintenance tips, troubleshooting, and service manual interpretations. These communities provide real-world insights and solutions from experienced users, fostering collaboration and knowledge sharing. They also serve as hubs for updates on the latest tools and techniques, ensuring users stay informed about best practices for their vehicles; Engaging with these forums can enhance diagnostic and repair capabilities, complementing the service manual effectively.

auto start stop manual restart required

Auto Start/Stop technology automatically shuts off and restarts the engine to save fuel․ When a “manual restart required” message appears, press the accelerator, brake, or clutch pedal to resume operation, addressing potential system malfunctions or electrical issues․

Overview of Auto Start/Stop System

The Auto Start/Stop system automatically shuts off the engine when the vehicle comes to a stop and restarts it when needed, improving fuel efficiency and reducing emissions․ This technology is designed to activate during idle situations, such as at traffic lights or in heavy traffic․ The system uses sensors and the engine control unit (ECU) to determine when to stop and restart the engine seamlessly․ If a “manual restart required” message appears, it indicates the system needs driver intervention to resume operation, often due to a malfunction or specific driving conditions․

Benefits of Auto Start/Stop Technology

Auto Start/Stop technology enhances fuel efficiency, reduces emissions, and lowers operating costs by minimizing engine idling․ It also decreases noise pollution in urban environments․ By automatically shutting off the engine during stops, the system conserves fuel and reduces wear on engine components․ This feature is particularly beneficial in stop-and-go traffic, where frequent idling occurs․ While occasional manual restarts may be needed, the overall benefits make it a valuable addition to modern vehicles, promoting sustainability and efficiency without compromising performance․

Common Issues with Auto Start/Stop Systems

Common issues with Auto Start/Stop systems include unexpected engine shutdowns, malfunction messages, and failure to restart automatically․ Low battery voltage, faulty sensors, or electrical connectivity problems often trigger these issues․ Drivers may encounter error messages like “manual restart required” or “auto start/stop malfunction,” indicating system failures․ These problems can disrupt the driving experience and require manual intervention, such as pressing the accelerator or brake pedal to restart the engine․ Regular maintenance and software updates are essential to minimize these issues and ensure smooth operation․

Understanding the “Manual Restart Required” Message

The “Manual Restart Required” message indicates the Auto Start/Stop system needs driver input to restart the engine safely after an automatic shutdown, ensuring proper function and preventing potential issues․

What Does “Manual Restart Required” Mean?

The “Manual Restart Required” message signals that the Auto Start/Stop system has shut down the engine and requires driver intervention to restart it․ This typically involves pressing the accelerator, brake, or clutch pedal․ The system may trigger this due to a malfunction, low battery, or sensor issues․ Ignoring the message can lead to engine stalling or failure to restart, potentially causing inconvenience or safety risks․ It is crucial to address the issue promptly by following the instructed actions to ensure smooth engine operation․

When Does the “Manual Restart Required” Message Appear?

The “Manual Restart Required” message appears when the Auto Start/Stop system detects a malfunction or condition preventing automatic engine restart․ This can occur during system glitches, low battery levels, or faulty sensor inputs․ For instance, after refueling, the engine might fail to restart automatically, triggering the message․ Similarly, issues like improper throttle response or electrical faults can cause it to appear․ In some cases, such as with the Ford Escape or Honda Pilot, the message may display after the engine shuts off due to system errors, requiring manual intervention to resume operation․

Implications of Ignoring the Message

Ignoring the “Manual Restart Required” message can lead to engine stalling or failure to restart, stranding the driver․ Prolonged inattention may cause increased fuel consumption, reduced efficiency, and potential damage to the Auto Start/Stop system․ Additionally, repeated system malfunctions could trigger persistent error codes, requiring professional diagnostics․ Overlooking the issue might also affect vehicle performance, such as rough idling or hesitation during acceleration, compromising overall driving safety and reliability․ Addressing the message promptly ensures smooth operation and prevents escalating problems․

Causes of Manual Restart Requirement

The “Manual Restart Required” message often results from system malfunctions, low battery levels, or faulty sensors․ These issues disrupt the Auto Start/Stop function, prompting driver intervention․

System Malfunction or Glitch

A system malfunction or glitch is a common cause of the “Manual Restart Required” message․ This occurs when the Auto Start/Stop system encounters an unexpected error, such as a software issue or communication failure between components․ Drivers may notice the engine shutting off unexpectedly or failing to restart automatically․ In such cases, the system prompts manual intervention, requiring the driver to press the accelerator, brake, or clutch pedal to restart the engine․ These glitches can stem from faulty sensors, corrupted software, or temporary system failures, disrupting the normal operation of the Auto Start/Stop feature․

Low Battery or Electrical Issues

Low battery voltage or electrical system issues often trigger the “Manual Restart Required” message․ A weak battery may prevent the Auto Start/Stop system from restarting the engine effectively, especially after a stop․ Corrosion in electrical connections or faulty alternator performance can disrupt power supply to critical components․ This interruption forces the system to request manual intervention, such as pressing the accelerator or brake pedal, to restart the engine․ Such issues are common in vehicles with high electrical demands, like the Ford Escape or Honda Pilot, where consistent power flow is essential for smooth operation․

Faulty Sensors or Components

Faulty sensors or components can disrupt the Auto Start/Stop system, triggering the “Manual Restart Required” message․ Sensors like the clutch position sensor, brake pedal switch, or engine speed sensor may fail to send accurate signals, preventing automatic engine restart․ Corrosion or damage to these components can also cause malfunctions․ For instance, a faulty throttle position sensor or crankshaft position sensor can mislead the system, resulting in manual intervention․ Such issues are common in vehicles like the Ford F-150 or Honda Pilot, where sensor reliability is critical for smooth operation․

Diagnosing the Issue

Check dashboard warning lights for system malfunctions․ Review vehicle error codes using diagnostic tools to identify specific faults․ Inspect the battery and electrical connections for damage or corrosion․

Checking the Dashboard Warning Lights

When the “manual restart required” message appears, check the dashboard for specific warning lights․ These may include the battery light, engine light, or auto start/stop malfunction light․ Each light indicates a different issue, such as a low battery, electrical fault, or system glitch․ Reviewing these lights helps pinpoint the problem․ For example, a steady or flashing light can signal severity levels․ If the auto start/stop light illuminates, it may indicate a malfunction in the system․ Always refer to your vehicle’s manual to understand the meaning of each warning light․ This step is crucial for diagnosing the root cause effectively․

Reviewing the Vehicle’s Error Codes

When the “manual restart required” message appears, check the vehicle’s error codes using an OBD-II scanner or the onboard diagnostics system․ Common codes related to auto start/stop issues include those indicating a malfunction in the system, low battery voltage, or faulty sensors․ These codes provide specific insights, such as P0ABC (auto stop/start system malfunction) or P1E6F (auto stop/start high battery voltage․ Reviewing these codes helps identify the root cause, whether it’s a software glitch, electrical issue, or component failure․ This step is essential for accurate diagnosis and repair․

Inspecting Battery and Electrical Connections

Inspecting the battery and electrical connections is crucial when the “manual restart required” message appears․ Check the battery terminals for corrosion or loose connections, as these can cause low voltage issues․ Verify the battery health using a multimeter to ensure proper charge levels․ Also, examine the alternator belt and connections for wear or damage․ Faulty electrical components can prevent the auto start/stop system from functioning correctly, leading to manual restart requirements․ Addressing these issues ensures reliable engine operation and prevents further system malfunctions․

How to Manually Restart the Engine

Press the accelerator pedal, brake pedal, or clutch pedal to manually restart the engine when the “manual restart required” message appears․ This action reactivates the system․

Pressing the Accelerator Pedal

Pressing the accelerator pedal is a common method to manually restart the engine when the “manual restart required” message appears․ Gently pressing the pedal signals the system to restart the engine, ensuring smooth operation․ This action is straightforward and effective in most cases․ Ensure the vehicle is in the correct gear and the surroundings are safe before accelerating․ This method works in conjunction with the auto start/stop technology to provide a seamless driving experience․ Always follow manufacturer guidelines for proper procedure․

Using the Brake Pedal

Using the brake pedal is another method to manually restart the engine when the “manual restart required” message appears․ By pressing the brake pedal firmly, the system recognizes the driver’s input and initiates engine restart․ This action is particularly useful when the vehicle is stationary and in a safe environment․ Ensure the brake is pressed fully and the transmission is in the correct gear before releasing․ This method is effective and ensures the vehicle resumes operation smoothly, aligning with the auto start/stop technology’s design for efficiency and convenience․

Engaging the Clutch Pedal

Engaging the clutch pedal is a reliable method to manually restart the engine when the “manual restart required” message appears․ This method is particularly effective in vehicles with manual transmissions․ Press the clutch pedal fully to the floor and ensure the vehicle is in neutral gear․ Once the clutch is engaged, the system will recognize the input and restart the engine․ This process is straightforward and ensures smooth operation, especially for drivers familiar with manual transmissions․ The engine will not restart unless the clutch is pressed fully, making this a safe and efficient option․

Temporary Solutions

Temporary solutions include disabling Auto Start/Stop, restarting the vehicle, or performing a system reset to address the “manual restart required” message until a permanent fix is applied․

Disabling the Auto Start/Stop Function

Disabling the Auto Start/Stop function can provide temporary relief․ Press the ECO switch or similar button to deactivate the system․ For Ford models, press the “AUTO START/STOP” button․ On Honda vehicles, toggle the ECON button․ This action prevents the engine from shutting off during stops․ Note that this is a temporary solution and may vary by model․ Always consult your vehicle’s manual for specific instructions, as the process ensures the engine remains running, avoiding manual restart issues until a permanent fix is implemented․

Restarting the Vehicle

Restarting the vehicle involves pressing the accelerator, brake, or clutch pedal to re-engage the engine․ For Ford models, press the accelerator gently․ Honda vehicles may require the brake pedal to be pressed․ Acura models often respond to the clutch pedal․ This action overrides the Auto Start/Stop system, allowing the engine to restart․ Ensure the vehicle is in a safe location before restarting․ Note that frequent manual restarts may indicate an underlying issue requiring professional attention․ Always refer to your vehicle’s manual for specific instructions to avoid further complications․

Performing a System Reset

A system reset can resolve issues with the Auto Start/Stop feature․ For Ford vehicles, press the ignition button without starting the engine, then cycle the ignition off and on․ In Honda models, disconnect the battery for 10 seconds to reset the system․ Acura vehicles may require a specific sequence of button presses․ After resetting, test the Auto Start/Stop functionality to ensure proper operation․ If issues persist, consult a professional technician to diagnose and repair any underlying problems․

Permanent Fixes

Permanent fixes may involve updating software, replacing faulty sensors, or addressing electrical issues․ Consulting a professional ensures lasting solutions and prevents recurring “manual restart required” messages․

Updating Software or Firmware

Updating the vehicle’s software or firmware can resolve issues causing the “manual restart required” message․ Modern vehicles rely on complex systems, and outdated software may lead to malfunctions․ Manufacturers often release updates to improve the Auto Start/Stop system’s performance and fix bugs․ Using a professional diagnostic tool or visiting a dealership ensures the update is applied correctly․ For some models, like the Ford F-150 or Honda Pilot, specific software patches address known issues․ Regular updates help maintain system stability and prevent recurring problems․ Always follow manufacturer guidelines for the best results․

Replacing Faulty Components

Replacing faulty components is often necessary to fix the “manual restart required” issue․ Sensors, such as battery or pedal sensors, may malfunction, causing the system to fail․ For Ford F-150 or Honda Pilot models, faulty sensors are common culprits․ Replacing these components ensures proper system operation․ Always use genuine parts and consult a mechanic for accurate diagnosis․ Addressing hardware issues promptly prevents recurring problems and maintains the Auto Start/Stop function’s efficiency․ Regular inspections can help identify failing parts before they cause system failures․

Consulting a Professional Mechanic

Consulting a professional mechanic is essential for resolving persistent “manual restart required” issues․ They can diagnose complex problems, such as faulty sensors or electrical malfunctions, and perform precise repairs․ Mechanics often use specialized tools to analyze error codes and system performance․ For models like the Ford F-150 or Honda Pilot, their expertise ensures proper functionality․ Regular inspections by a mechanic can prevent recurring issues and maintain the reliability of the Auto Start/Stop system․ Their knowledge is invaluable for ensuring long-term vehicle performance and efficiency․

Preventive Measures

Regular maintenance, monitoring battery health, and updating software help prevent Auto Start/Stop issues․ These steps ensure smooth engine operation and reduce manual restart requirements․

Regular Maintenance Checks

Regular maintenance checks are crucial to ensure Auto Start/Stop systems function optimally․ Schedule routine inspections of the battery, sensors, and electrical connections․ Addressing issues early prevents malfunctions․ Keep software updated to fix bugs․ Clean terminals and ensure proper connections․ Check for worn components like belts or starters․ Monitor dashboard warnings and error codes․ Perform system resets if needed․ Consistent upkeep reduces the likelihood of manual restart requirements and enhances fuel efficiency․

Monitoring Battery Health

Monitoring battery health is vital as a weak or discharged battery can trigger “manual restart required” messages․ Check voltage levels and ensure terminals are clean and secure․ Old or degraded batteries may fail to restart the engine, causing system malfunctions․ Use a multimeter for accurate readings and charge the battery if necessary․ Replace it if capacity is below recommended levels․ A healthy battery ensures smooth Auto Start/Stop operation, reducing the need for manual interventions and maintaining fuel efficiency․

Updating Vehicle Software

Updating your vehicle’s software is crucial for resolving “manual restart required” issues․ Manufacturers often release updates to improve the Auto Start/Stop system’s performance․ Check for updates through the manufacturer’s website or online forums․ For Ford F-150, Honda Pilot, and Acura TLX models, software updates have addressed system malfunctions and error messages․ Ensure your vehicle’s software is current to prevent glitches and ensure smooth engine operation․ Regular updates can enhance reliability and prevent issues related to the Auto Start/Stop function, reducing the need for manual interventions․

Model-Specific Issues

Model-specific issues arise in Ford F-150, Honda Pilot, and Acura TLX․ Each model experiences unique Auto Start/Stop malfunctions, necessitating tailored diagnostic approaches for resolution․

Ford Vehicles (F-150, Escape)

Ford F-150 and Escape models often experience Auto Start/Stop issues, such as the engine stalling or failing to restart․ Symptoms include the engine shutting off unexpectedly and requiring manual intervention․ Some owners report trouble starting the vehicle after refueling, with error messages like “manual restart required” appearing on the dashboard․ These problems may stem from faulty sensors or electrical system glitches․ While temporary workarounds like disabling the Auto Start/Stop function exist, persistent issues may require professional diagnostic tools or software updates for resolution․

Honda Vehicles (Pilot, Passport)

Honda Pilot and Passport models equipped with Auto Start/Stop technology have reported issues where the engine fails to restart automatically․ Drivers have experienced the engine shutting off and displaying a “manual restart required” message․ This typically occurs when stopping and restarting the engine, with some instances requiring multiple attempts to restart․ Such problems may be linked to software glitches or sensor malfunctions․ Honda has issued service bulletins for affected models, recommending updates and inspections to address these concerns and improve system reliability for a smoother driving experience․

Acura Vehicles (TLX)

Acura TLX models have also encountered issues with the Auto Start/Stop system, particularly when the engine shuts off and requires a manual restart․ This often occurs during stops or when attempting to restart after fueling․ Drivers have reported the system failing to automatically restart the engine, displaying messages like “manual restart required․” Pressing the accelerator or brake pedal typically resolves the issue, but recurring problems may indicate underlying electrical or software issues․ Consulting a professional mechanic is recommended for persistent concerns to ensure proper functionality and prevent further complications․

The “manual restart required” message indicates a need for driver intervention․ Addressing underlying issues promptly ensures optimal performance and efficiency of the Auto Start/Stop system․

The “manual restart required” message signals the Auto Start/Stop system needs driver intervention․ Common causes include malfunctions, low battery, or faulty sensors․ Pressing the accelerator, brake, or clutch pedal typically resolves the issue․ Model-specific issues affect Ford, Honda, and Acura vehicles․ Diagnosing involves checking error codes and battery connections․ Temporary fixes like disabling the system or restarting the vehicle can help, while permanent solutions may require software updates or component replacements․ Regular maintenance and monitoring battery health prevent future occurrences․ Addressing the issue promptly ensures system efficiency and reliability․ Professional consultation is advisable for persistent problems․

Importance of Addressing the Issue

Addressing the “manual restart required” issue is crucial to prevent engine stalling, reduced fuel efficiency, and potential mechanical damage․ Ignoring the message can lead to increased emissions and compromised vehicle performance․ Timely intervention ensures smooth operation, maintains fuel savings, and avoids costly repairs․ Regular maintenance and prompt repairs are essential for sustaining the reliability and efficiency of the Auto Start/Stop system, ensuring optimal vehicle functionality and driver safety․ Neglecting the issue may result in more severe problems over time, emphasizing the need for immediate attention and professional consultation if issues persist․

Final Thoughts on Auto Start/Stop Technology

Auto Start/Stop technology remains a valuable innovation for reducing fuel consumption and emissions․ While occasional issues like “manual restart required” can be inconvenient, proper maintenance and timely repairs ensure its effectiveness․ Modern vehicles continue to refine this system, addressing user concerns․ Drivers may need to adapt to its operation, but the long-term benefits for efficiency and environmental impact make it a worthwhile feature․ As technology evolves, expect improved reliability and seamless integration into driving experiences, solidifying its role in the automotive industry’s sustainable future․

Additional Resources

Consult manufacturer guidelines for specific models like Ford F-150 or Honda Pilot․ Online forums and communities offer user experiences and solutions․ Professional diagnostic tools aid in troubleshooting issues․

Manufacturer Guidelines

Manufacturers provide specific bulletins and repair instructions for auto start/stop issues․ For Ford F-150, Escape, and Honda Pilot, Passport, and Acura TLX models, guidelines address common faults and solutions․ Always refer to the official repair manuals and updated software for your vehicle․ Following manufacturer recommendations ensures proper system function and prevents future malfunctions․ Regular updates and diagnostics are essential for maintaining the auto start/stop technology․ Consulting these resources helps resolve issues like “manual restart required” efficiently and safely, ensuring your vehicle operates as intended․

Online Forums and Communities

Online forums and communities provide valuable insights and solutions for “auto start stop manual restart required” issues․ Many users share experiences, such as a Ford F-150 owner resolving the problem by disabling the system or a Honda Pilot driver troubleshooting through error codes․ These platforms offer practical advice, like restarting the vehicle or performing a system reset․ Forum discussions often highlight temporary fixes and long-term solutions, helping drivers avoid repeated issues․ Engaging with these communities can provide real-world solutions and tips for addressing auto start/stop malfunctions effectively․

Professional Diagnostic Tools

Professional diagnostic tools are essential for identifying the root cause of “manual restart required” messages․ Tools like OBD-II scanners can retrieve error codes, such as those related to battery health or sensor malfunctions․ Advanced software can analyze the auto start/stop system’s functionality, pinpointing issues like faulty components or software glitches․ These tools enable mechanics to perform detailed inspections and updates, ensuring accurate diagnoses and effective repairs․ Regular use of diagnostic tools helps maintain system efficiency and prevents recurring problems in vehicles equipped with auto start/stop technology․

cuisinart instructions ice cream maker

Welcome to the Cuisinart Ice Cream Maker, a top choice for crafting delicious homemade desserts with ease and precision.

Whether you’re making classic ice cream, frozen yogurt, or sorbet, this machine offers simplicity and versatility for every dessert lover.

With models like the ICE-21 and ICE-20, it’s designed to churn perfect treats quickly, ensuring a creamy texture in just minutes.

Overview of the Cuisinart Ice Cream Maker

The Cuisinart Ice Cream Maker, including models like the ICE-20 and ICE-21, is a versatile kitchen appliance designed for homemade frozen treats. It features automatic operation, a double-insulated freezer bowl, and fast churning times, typically under 20 minutes. Perfect for ice cream, frozen yogurt, and sorbet, this machine allows users to create customizable desserts with ease. Its compact and user-friendly design makes it ideal for families and dessert enthusiasts alike, ensuring delicious and healthier options right at home. Easy to use and clean, it’s a great addition to any kitchen.

Why Choose the Cuisinart Ice Cream Maker

Choose the Cuisinart Ice Cream Maker for its unmatched convenience and versatility in creating homemade frozen desserts. With automatic operation, it simplifies the process, requiring minimal effort. The double-insulated freezer bowl ensures quick and efficient churning, while the compact design saves kitchen space. Perfect for ice cream, frozen yogurt, and sorbet, it offers customization options to suit every taste. Its ease of use and durability make it a top choice for families and dessert lovers, providing delicious results every time with minimal cleanup.

Key Features and Benefits

The Cuisinart Ice Cream Maker offers automatic operation, a double-insulated freezer bowl, and fast churning time, ensuring creamy results in minutes with minimal effort and cleanup.

Automatic Operation for Convenience

The Cuisinart Ice Cream Maker offers effortless operation, allowing you to create homemade desserts with minimal effort. Simply pour your ingredients into the machine, turn it on, and let it do the work. This feature makes it ideal for both novice and experienced users, ensuring consistent results every time.

The automatic operation eliminates the need for manual churning, saving you time and effort. With models like the ICE-21 and ICE-20, you can enjoy perfectly churned ice cream, frozen yogurt, or sorbet in less than 20 minutes. Its user-friendly design ensures a smooth experience for everyone, including families with children, making it a delightful addition to any kitchen.

Double Insulated Freezer Bowl

The Cuisinart Ice Cream Maker features a double insulated freezer bowl, designed to maintain optimal temperature during the churning process. This ensures a smoother, creamier texture for your homemade ice cream, frozen yogurt, or sorbet. The insulation keeps the bowl cold for a longer period, allowing faster freezing and even churning. Simply pre-freeze the bowl overnight, add your ingredients, and let the machine work its magic. This innovative design enhances efficiency and convenience, making it easier to achieve professional-quality results at home.

Fast Churning Time

The Cuisinart Ice Cream Maker stands out for its fast churning time, producing delicious frozen treats in under 20 minutes. Its efficient design ensures quick results without compromising on quality. Whether you’re making ice cream, sorbet, or frozen yogurt, the machine works rapidly to churn ingredients into a smooth, consistent texture. This feature makes it ideal for busy households or those who want to enjoy fresh desserts with minimal wait time. The quick process also helps preserve the freshness and flavor of your ingredients, ensuring a delightful experience every time.

Assembly and Preparation

Assembly is quick and straightforward, requiring minimal effort to secure the spindle and paddle. Organize ingredients beforehand for a seamless experience with your Cuisinart ICE-21 or ICE-20.

Unboxing and Initial Setup

Upon unboxing, carefully inspect all components, including the motor unit, freezer bowl, and paddle. Ensure the spindle is securely attached to the motor unit’s base for proper operation. Wash all parts with warm, soapy water before first use. Dry thoroughly to prevent any moisture issues. Place the freezer bowl in the freezer for at least 6 hours to pre-chill, ensuring optimal churning performance. This setup process guarantees a smooth start to your ice cream-making journey with the Cuisinart ICE-21 or ICE-20.

Understanding the Components

The Cuisinart Ice Cream Maker consists of key parts: the motor unit, freezer bowl, paddle, and spindle. The motor unit powers the machine, while the double-insulated freezer bowl ensures even freezing. The paddle mixes ingredients for a smooth texture, and the spindle connects it to the motor. These components work together to churn ingredients into creamy desserts. Understanding each part’s role is essential for proper assembly and operation, ensuring you achieve the best results with your Cuisinart ICE-21 or ICE-20 model.

Step-by-Step Assembly Guide

Begin by securing the spindle to the motor unit or lid, ensuring it’s tightly fastened. Next, attach the paddle to the spindle, aligning it properly for even mixing. Place the double-insulated freezer bowl onto the motor base, making sure it clicks into position. Finally, pour your prepared ingredients into the bowl and start the machine. Always refer to the manual for specific model instructions, such as the ICE-21 or ICE-20, to ensure correct assembly and optimal performance. Proper alignment and secure fitting are crucial for smooth operation.

Operating the Cuisinart Ice Cream Maker

Turn on the machine, pour ingredients into the spout, and let it churn. The automatic feature ensures hands-free operation, delivering creamy desserts in under 20 minutes.

Pre-Operation Checks

Before using your Cuisinart Ice Cream Maker, ensure all components are secure and ready. Check that the spindle is firmly attached to the motor unit and the paddle is properly aligned. Verify that the freezer bowl is pre-chilled for at least 6 hours if required by your model. Gather all ingredients and ensure they are pre-measured and chilled. Make sure the machine is placed on a stable, even surface. Lastly, review the recipe and instructions to confirm everything is prepared correctly for a smooth operation.

Adding Ingredients

When using your Cuisinart Ice Cream Maker, ensure the machine is turned on before adding ingredients to the freezer bowl for proper mixing. Add pre-measured, chilled ingredients through the spout, allowing even incorporation. Avoid overloading the bowl to maintain efficiency. Keep ingredients ready and within reach to streamline the process. Proper addition ensures a smooth and consistent final product, making your homemade desserts a success every time.

Starting the Machine

Once all ingredients are prepared, ensure the freezer bowl is securely placed under the motor unit. Attach the paddle to the spindle and lock it in place. Plug in the machine and turn it on using the power switch. The machine will begin churning automatically, creating a smooth and creamy texture. Always follow the manufacturer’s guidelines for operation to ensure optimal performance. The machine will handle the rest, producing delicious results in minutes. Proper setup ensures safe and efficient operation.

Monitoring the Churning Process

While the machine operates, monitor the churning process to ensure everything runs smoothly. The transparent lid allows you to view the mixture as it transforms. You’ll hear the motor working and see the paddle moving. The machine will stop automatically once the churning is complete, typically within 15-20 minutes. Check the consistency by lifting the lid slightly. If the mixture is too runny, let it churn a few more minutes. Avoid overfilling the bowl, as this can affect performance. Always refer to the manual for troubleshooting tips if needed. Proper monitoring ensures perfect results.

Recipe Ideas and Customization

Explore endless possibilities with classic recipes, frozen yogurt, and sorbet. Customize flavors by adding mix-ins like fruits, nuts, or cocoa for unique treats tailored to your taste.

Classic Ice Cream Recipes

Start with timeless favorites like vanilla, chocolate, or strawberry ice cream. These simple yet delicious recipes are perfect for beginners and loved by everyone.

Combine cream, sugar, and flavorings, then churn until smooth. For added texture, mix in chocolate chips, nuts, or fruit pieces during the final stages of churning.

Classic recipes provide a foundation for creativity, allowing you to experiment with unique flavors and ingredients for personalized treats. Enjoy the perfect blend of tradition and innovation!

Frozen Yogurt and Sorbet Options

Expand your dessert options with the Cuisinart Ice Cream Maker by crafting delicious frozen yogurt and sorbet. Frozen yogurt offers a lighter, healthier alternative to traditional ice cream, while sorbet provides a fruity, dairy-free treat.

Both options are easy to make—simply add your preferred ingredients, such as yogurt or pureed fruit, to the machine. The automatic churning process ensures a smooth, even texture in minutes.

Customize flavors with mix-ins like berries, nuts, or cocoa powder for added taste and texture. These options are perfect for dietary restrictions or refreshing summer treats.

Customizing Flavors

Customizing flavors with your Cuisinart Ice Cream Maker is effortless and fun. Experiment with unique ingredients like cocoa powder for chocolate ice cream or vanilla extract for a classic taste.

Add mix-ins such as berries, nuts, or candy pieces toward the end of the churning process for a personalized touch. For a lighter option, incorporate fresh fruit purees or citrus zest.

With endless possibilities, you can create vegan-friendly or dairy-free versions using plant-based milks. Layer flavors in the freezer for a multi-colored, multi-flavored dessert. The machine’s versatility ensures every batch is tailored to your taste.

Troubleshooting Common Issues

If the machine isn’t turning on, ensure it’s properly plugged in and all parts are securely assembled. If the motor is noisy, check for obstructions or uneven balancing.

If ice cream isn’t churning, verify that the freezer bowl is fully frozen and ingredients are at the correct temperature. Overloaded machines may struggle, so avoid excess mix.

For icy textures, ensure ingredients are cold but not frozen solid. If the paddle isn’t moving, make sure it’s securely attached to the spindle.

Refer to the manual for detailed solutions, and always follow safety guidelines to prevent damage or injury.

Maintenance and Storage

Regularly clean the machine with warm, soapy water and dry thoroughly. Store the freezer bowl in a dry place, and keep components organized for easy access.

Cleaning the Machine

Cleaning your Cuisinart Ice Cream Maker is essential for maintaining hygiene and performance. After each use, wash the freezer bowl, lid, and paddle with warm, soapy water. Avoid using abrasive cleaners or scourers, as they may damage the surfaces. Rinse thoroughly and dry with a soft cloth to prevent water spots. For tough residue, soak parts in warm water before scrubbing gently. Regular cleaning ensures your machine remains in top condition and prevents any lingering flavors from affecting future batches. Always check for stubborn stains and clean them promptly to maintain optimal functionality. Cleaning regularly also extends the lifespan of your ice cream maker and keeps it ready for the next use.

Storing the Ice Cream Maker

Proper storage of your Cuisinart Ice Cream Maker ensures its longevity and performance. After cleaning, store the machine in a cool, dry place, away from direct sunlight. The freezer bowl should be kept in the freezer if you plan to use it soon or in a dry location otherwise. Always detach the cord and store it separately to prevent tangling. Avoid stacking heavy objects on the machine to avoid damage. Regularly inspect stored parts for moisture or dust and address any issues promptly. Proper storage maintains the machine’s efficiency and readiness for future use.

Regular Maintenance Tips

Regular maintenance ensures your Cuisinart Ice Cream Maker performs optimally. After each use, thoroughly clean and dry all components to prevent residue buildup. Lubricate moving parts occasionally to maintain smooth operation. Check the paddle and spindle for wear and replace if necessary. Store the freezer bowl properly to avoid moisture damage. Descale the machine if you notice mineral buildup. Always inspect the cord and plug for damage before use. Regular checks and upkeep will extend the lifespan of your ice cream maker and ensure consistent results. Proper care ensures years of delicious homemade desserts.

Warranty and Support

The Cuisinart Ice Cream Maker is backed by a limited warranty covering defects in materials and workmanship. Customer support is available for troubleshooting and inquiries.

Understanding the Warranty

The Cuisinart Ice Cream Maker is warranted to be free of defects in materials and workmanship under normal home use for a specified period. This warranty covers manufacturing defects, ensuring your machine performs as promised. Coverage typically lasts for three years from the date of purchase, offering peace of mind for your investment. The warranty does not apply to misuse, accidental damage, or wear and tear. To validate your warranty, register your product with Cuisinart and retain your purchase receipt. Contact customer support for warranty claims or inquiries.

Customer Support Options

Cuisinart offers comprehensive customer support to ensure a smooth experience with your ice cream maker. You can contact their support team via phone, email, or live chat for assistance with troubleshooting, maintenance, or general inquiries. Additionally, Cuisinart provides online resources, including user manuals, troubleshooting guides, and FAQs, to help you resolve issues independently. Their dedicated support team is available to address concerns and provide guidance, ensuring your ice cream maker continues to perform optimally. For replacement parts or repairs, reach out to their customer service for prompt solutions.

The Cuisinart Ice Cream Maker offers convenience, speed, and versatility, perfect for crafting delicious homemade desserts with ease, making it a must-have for every dessert lover.

Final Tips for Using Your Cuisinart Ice Cream Maker

  • Always pre-freeze the double-insulated bowl for at least 6 hours before use for optimal results.
  • Use high-quality ingredients to ensure the best flavor and texture in your frozen treats.
  • Monitor the churning process closely to avoid over-mixing, which can lead to icy textures.
  • Experiment with unique flavor combinations to create personalized desserts.
  • Regularly clean and maintain the machine to extend its lifespan and performance.

Exploring Advanced Features

The Cuisinart Ice Cream Maker goes beyond basic functionality, offering advanced features that elevate your dessert-making experience.

  • Automatic operation allows for hands-free churning, ensuring consistent results every time.
  • The double-insulated freezer bowl enables faster freezing and creamier textures without pre-freezing.
  • Customizable settings let you adjust churning time and speed for different dessert types.
  • The machine supports add-ins like mix-ins or flavorings mid-churn for unique creations.
  • Advanced models include timers and automatic shut-off for convenience.

These features make it easy to experiment with intricate recipes and achieve professional-quality results at home.

domains of delight pdf

Domains of Delight is a guide to creating vibrant Feywild domains and archfey. Inspired by the Feywild’s magic, it offers tools for crafting unique realms. Available on DMs Guild for $8.00, with proceeds supporting Extra Life.

Overview of the Domains of Delight PDF

The Domains of Delight PDF is a 36-page supplement designed to expand the Feywild in Dungeons & Dragons. It provides tools for creating custom domains and archfey, offering a deep dive into the Feywild’s lore. The guide includes rules for designing unique archfey, domain creation tools, and insights into the Feywild’s magical properties. Available on DMs Guild, the supplement is priced at $8.00, with all proceeds benefiting Extra Life, a charity supporting children’s hospitals. This resource is perfect for DMs seeking to enrich their Feywild campaigns with vibrant, dynamic domains and compelling archfey characters. The PDF is formatted for easy reading, making it a valuable addition to any D&D collection focused on the Feywild.

Importance of the Feywild in Dungeons & Dragons

The Feywild is a plane of vibrant magic, wonder, and unpredictability in Dungeons & Dragons, serving as a unique setting for adventures and storytelling. As a realm of enchantment, it contrasts sharply with the Material Plane, offering endless possibilities for exploration and encounters. The Feywild is home to powerful archfey, magical creatures, and ever-shifting landscapes, making it a rich source of inspiration for DMs and players alike. Its importance lies in its ability to inspire creative narratives, challenging players with moral dilemmas and whimsical challenges. The Feywild’s influence extends beyond its borders, impacting the Material Plane and other realms, making it a vital part of D&D lore. Its vibrant essence ensures it remains a captivating destination for any campaign.

Structure and Content of the Supplement

The Domains of Delight supplement is a 36-page PDF designed to expand the Feywild in Dungeons & Dragons. It provides detailed guidelines for creating custom domains, from their size to their unique magical properties. The supplement includes tools for crafting archfey, their motivations, and how they interact with mortals. Players and DMs will find rules for designing unique archfey and shaping their realms, along with rich lore to deepen the Feywild’s mystique. The content is structured to help DMs build immersive experiences, offering both practical mechanics and narrative inspiration. This resource is ideal for enhancing Feywild-based campaigns, ensuring endless creativity and engagement for players and storytellers alike. Its clear organization makes it easy to navigate and implement in any D&D setting.

Key Features of Domains of Delight

Featuring tools for custom domain creation, archfey design rules, and expanded Feywild lore, this supplement enhances storytelling and world-building for D&D campaigns.

Tools for Creating Custom Domains

Domains of Delight provides comprehensive tools for crafting unique Feywild domains, from mapping layouts to setting themes. These tools enable Dungeon Masters to create immersive environments tailored to their campaigns, ensuring each domain reflects the vibrant essence of the Feywild. Whether it’s a lush forest or a shimmering palace, the guide offers frameworks to bring these magical realms to life, enhancing both storytelling and player engagement. The supplement also includes guidance on integrating domain-specific rules and encounters, making it a versatile resource for enriching any D&D adventure set within the Feywild.

Archfey and Their Roles in the Feywild

Archfey are powerful, enigmatic beings that rule over the Feywild’s vibrant domains. They embody the plane’s essence, wielding immense magical power and shaping their realms to reflect their personalities. As guardians of their domains, archfey maintain balance and order within the Feywild, often interacting with mortals in mysterious ways. The Domains of Delight PDF provides insights into their roles, offering tools to create unique archfey and their domains; These beings are central to the Feywild’s lore, serving as both rulers and storytellers. The supplement helps Dungeon Masters integrate archfey into campaigns, enhancing the mystical and unpredictable nature of the Feywild. Their influence is unparalleled, making them key elements in any Feywild-based adventure.

Rules for Designing Unique Archfey

The Domains of Delight PDF offers comprehensive rules for crafting unique archfey, tailored to enrich your Feywild campaigns. These guidelines provide a flexible framework to define an archfey’s personality, powers, and domain. Players and DMs can customize archfey to suit their stories, ensuring each one feels distinct and immersive. The supplement includes mechanics for creating archfey abilities, aligning their powers with their domains’ themes. It also provides examples and optional rules to adapt archfey to various campaign settings. With these tools, you can design archfey that resonate with your narrative, enhancing the Feywild’s mystical allure. The rules emphasize creativity while maintaining balance, ensuring a seamless integration into any D&D adventure.

Expanding the Feywild Lore

Domains of Delight enriches the Feywild’s lore by delving into its mystical nature and vibrant domains. The PDF details the Feywild as a plane of contrasts, where beauty and danger coexist. It explores the roles of archfey, their domains, and the intricate relationships within this enchanted realm. By expanding on existing lore, the supplement offers fresh insights into the Feywild’s unique properties, such as its shifting landscapes and magical phenomena. Players and DMs gain a deeper understanding of this plane, enabling them to craft compelling narratives. The PDF also connects the Feywild to other planes, enhancing its role in multiverse storytelling. This expansion ensures the Feywild remains a captivating and mysterious setting for any D&D campaign, inspiring endless creativity and adventure.

Archfey and Their Domains

Archfey are powerful rulers of the Feywild, each governing a unique domain. These realms reflect their personalities, from enchanted forests to surreal landscapes, shaping the Feywild’s magic and lore.

Characteristics of Archfey in the Feywild

Archfey are enigmatic beings with unique traits, often embodying aspects of nature, emotion, or magic. Their domains mirror their personalities, from whimsical to dark. They possess immense power, shaping reality within their realms. Archfey are known for their cunning and unpredictability, making them formidable allies or foes. Their connection to the Feywild grants them extraordinary abilities, such as manipulating emotions or bending time. Each archfey’s domain is a reflection of their essence, creating diverse and immersive environments. These characteristics make archfey central to the Feywild’s lore, offering rich storytelling opportunities for D&D campaigns.

Creating Archfey for Your Campaign

Creating archfey for your campaign involves blending lore, mechanics, and creativity. The Domains of Delight PDF provides tools to craft unique archfey, tailored to your campaign’s tone. Whether benevolent or mischievous, these beings can serve as patrons, antagonists, or enigmatic guides. The guide offers frameworks for defining their powers, personalities, and domain traits, ensuring they fit seamlessly into the Feywild’s mystical fabric. By customizing archfey, DMs can challenge players with moral dilemmas, magical puzzles, or ethereal encounters. This section empowers you to shape the Feywild’s essence, making every archfey and their domain a memorable part of your story.

Domain Size and Scope

Domains of Delight can vary dramatically in size, from a few enchanted acres to vast, country-spanning realms. This flexibility allows DMs to tailor the scale of their Feywild campaigns. Smaller domains might focus on intricate, personal stories with the archfey, while larger ones can encompass entire nations, complete with diverse environments and complex politics. The PDF provides guidance on balancing domain size with narrative impact, ensuring each realm feels unique and immersive. Whether a domain is a cozy glade or an expansive kingdom, its scope should reflect the archfey’s personality and the magical essence of the Feywild. This adaptability makes the Feywild a dynamic setting for any campaign style.

Interactions Between Archfey and Mortals

Interactions between archfey and mortals in Domains of Delight are complex and often filled with intrigue. Archfey, as rulers of their realms, may view mortals as playthings, allies, or pawns in their schemes. Bargains and deals are common, with archfey offering magical boons or knowledge in exchange for loyalty, tasks, or sacrifices. Mortals must tread carefully, as the Feywild’s unpredictable nature and the archfey’s capriciousness can lead to unforeseen consequences. These interactions can shape the tone of a campaign, blending humor, danger, and wonder. The PDF provides insights into how to craft these encounters, ensuring they enrich the story and deepen the mystery of the Feywild;

The Feywild and Its Mysteries

The Feywild is a vibrant plane of mystery and beauty. Domains of Delight enhances your understanding of its lore, unique properties, and the magic within its ever-changing landscapes.

Understanding the Feywild as a Plane

The Feywild is a plane of vibrant beauty and mystery, a bright reflection of the Material Plane. It is a realm of enchantment, where magic flows freely and reality is fluid. Governed by powerful archfey, the Feywild is home to Domains of Delight—secluded realms that embody the essence of their rulers. These domains can range from a few acres to vast landscapes, each reflecting the unique personality and power of their archfey. The Feywild’s ever-changing nature makes it a place of wonder and unpredictability, where mortals and fey alike are drawn into its captivating embrace. Domains of Delight expands on this lore, offering insights and tools to explore the Feywild’s magic and mystery in your D&D campaigns.

Unique Properties of the Feywild

The Feywild is a plane of vibrant beauty and magic, where reality is fluid and ever-changing. Unlike other planes, it is characterized by its dynamic and unpredictable nature, where time and space bend differently. The plane is alive with enchantment, and its landscapes are shaped by the emotions and whims of its inhabitants. Domains of Delight, governed by archfey, are a hallmark of the Feywild, each reflecting the unique personality and power of its ruler. These domains can shift and change, making the Feywild a place of endless wonder and discovery. The interplay of magic and the plane’s inherent unpredictability creates a realm that is both captivating and challenging for mortals to navigate.

Role of Domains of Delight in the Feywild

Domains of Delight serve as the heart of the Feywild, embodying the essence of this enchanted plane. They are vibrant, self-contained realms ruled by archfey, who shape their domains to reflect their personalities and powers. These domains are not just geographical locations but living manifestations of the Feywild’s magic, influencing the emotions and experiences of those who enter. They create unique environments where the boundaries between reality and illusion blur, offering endless possibilities for adventure and storytelling. The Domains of Delight supplement enhances the Feywild’s depth by providing tools to craft these realms, making them central to any campaign set in this mystical plane. They are integral to the Feywild’s identity, offering players and DMs alike a gateway to its wonders.

Connection to Other Planes

The Feywild, home to Domains of Delight, is intricately connected to other planes, particularly the Material Plane and the Shadowfell. These connections allow for unique interactions, as the Feywild’s magic often seeps into neighboring realms. Portals, natural phenomena, or even the influence of archfey can bridge these planes, creating opportunities for crossover adventures. The Domains of Delight supplement explores how these connections work, offering insights into how the Feywild’s vibrant energy interacts with darker planes like the Shadowfell. This interplay enriches campaigns, allowing DMs to weave intricate narratives that span multiple planes. By understanding these connections, players and DMs can explore the Feywild’s role in the broader multiverse, adding depth to their storytelling and world-building efforts.

Charity and Availability

Domains of Delight is available on DMs Guild for $8.00, with all proceeds benefiting Extra Life. This initiative supports Children’s Miracle Network Hospitals.

Proceeds for Charity

Domains of Delight supports a noble cause, with all proceeds from its sales benefiting Extra Life, a nonprofit organization dedicated to raising funds for the Children’s Miracle Network Hospitals. This initiative highlights Wizards of the Coast’s commitment to giving back to the community. By purchasing the supplement, fans of Dungeons & Dragons contribute directly to helping children in need. The PDF is priced at $8.00 on DMs Guild, making it an accessible way to support charity while expanding your Feywild campaign. This collaboration between the D&D community and Extra Life underscores the positive impact of tabletop gaming beyond the table. It’s a meaningful way to make a difference while enjoying the magic of the Feywild.

Availability on DMs Guild

Domains of Delight is officially available on the DMs Guild platform as a digital PDF supplement. Priced at $8.00, it offers 36 pages of content dedicated to expanding the Feywild. This resource is designed to help Dungeon Masters and players alike create unique domains and archfey, enriching their campaigns. The PDF is optimized for digital use, ensuring easy access and readability. As an official Wizards of the Coast release, it aligns with existing D&D lore while introducing fresh ideas. Fans can conveniently purchase and download it from the DMs Guild website, making it a seamless addition to any Feywild-focused campaign. Its availability underscores the growing support for Feywild content in the D&D community.

Pricing and Format

Domains of Delight is available as a digital PDF on the DMs Guild for $8.00. This 36-page supplement is formatted in standard letter size and is optimized for digital viewing. The PDF includes detailed content for creating custom domains and archfey, making it a valuable resource for Dungeon Masters and players. Its pricing reflects the high-quality content and design, ensuring accessibility while supporting a good cause. The PDF format allows for easy navigation and reference during gameplay. With its clear layout and engaging design, Domains of Delight is a must-have for anyone looking to expand their Feywild campaigns. The supplement is available exclusively through the DMs Guild platform, ensuring authenticity and quality. Its pricing is competitive, making it a worthwhile investment for D&D enthusiasts.

Support for Extra Life

Domains of Delight proudly supports Extra Life, a nonprofit organization dedicated to raising funds for the Children’s Miracle Network Hospitals. By purchasing the supplement, fans contribute directly to this charitable cause. Wizards of the Coast has championed this initiative, ensuring all proceeds from the sale of Domains of Delight benefit Extra Life. This collaboration not only enriches D&D campaigns but also gives back to the community. The partnership reflects the company’s commitment to using its platform for positive impact; Players and Dungeon Masters can feel good about enhancing their Feywild adventures while supporting a meaningful cause. This charitable effort underscores the importance of giving back through gaming.

Domains of Delight is a charming addition to D&D, offering Feywild depth and charity support. Its creative tools and archfey lore inspire memorable campaigns while benefiting Extra Life.

Final Thoughts on Domains of Delight

Impact on D&D Campaigns

Domains of Delight significantly enhances Dungeons & Dragons campaigns by offering fresh, immersive content for the Feywild. It provides tools for crafting unique domains and archfey, enabling DMs to create vibrant, otherworldly settings that captivate players. The supplement’s focus on customization allows for tailored storytelling, making each campaign feel distinct. Players benefit from new lore and interactive environments, while DMs gain a wealth of resources to expand their Feywild narratives. Its charity-driven model also fosters community support, making it a meaningful addition to any D&D collection. This supplement not only enriches gameplay but also inspires creativity, ensuring unforgettable adventures in the enchanting realms of the Feywild.

Future of Feywild Content

Domains of Delight sets a promising foundation for future Feywild content, inspiring new ways to explore this enchanting plane. Its success could pave the way for more detailed expansions, delving deeper into the lore and mechanics of the Feywild. The supplement’s focus on customization and creativity encourages DMs and players to craft unique experiences, potentially leading to a wave of community-driven content. As Wizards of the Coast continues to support the Feywild, fans can expect more supplements and adventures that expand on its mystical realms. The charity-driven model of Domains of Delight also highlights a growing trend of community-focused initiatives in D&D, fostering a culture of creativity and generosity. The future of Feywild content is bright, with endless possibilities for exploration and storytelling.